1. Download and Install StreetBuilder on your computer, from this: GoThru
2. Run the .exe file and open StreetBuilder from your desktop icon - make sure you have an account with gothru.co in order to login in StreetBuilder
3. To create a new project just click on
Create Project to add
the 360 video file or just drop the video/s in the designated area 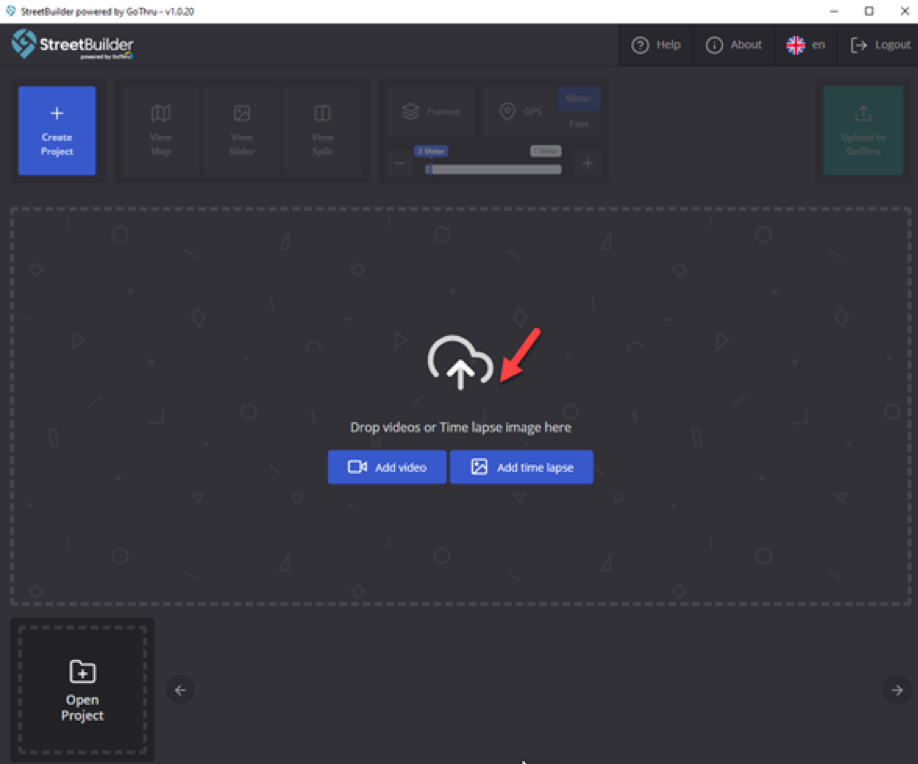
4. Wait for the video to be fully uploaded.
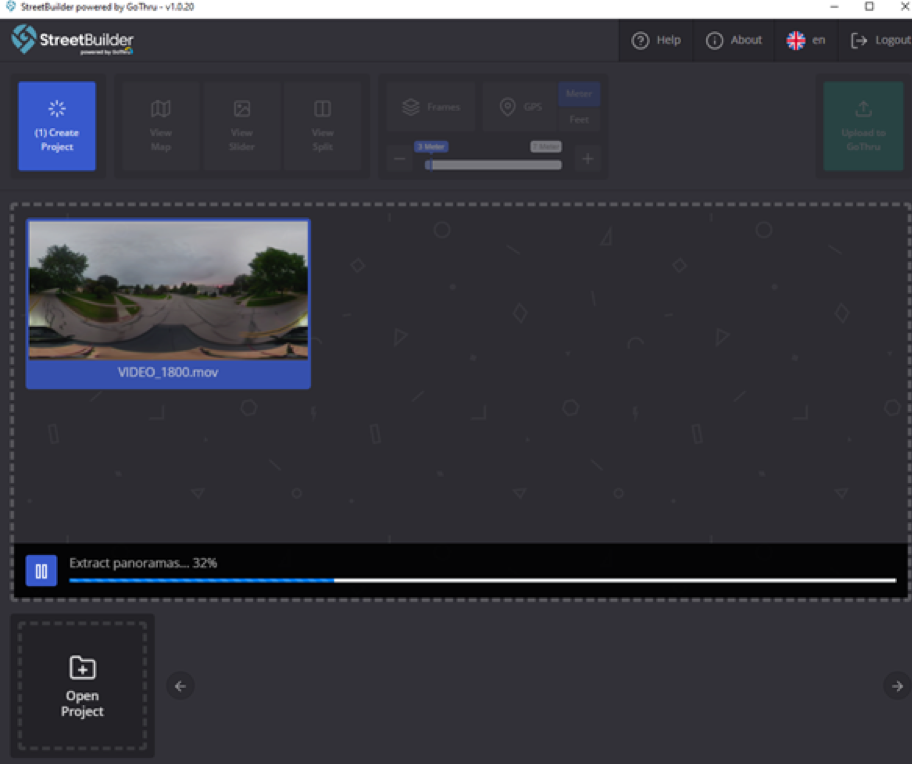
5. StreetBuilder is extracting the panoramas
from the video,
at a default distance between the frames, in the presented example it extracted 641
panoramas at a 5m
distance. It will create, at the same time, a folder named “gothru-streetbuilder -
name of the video”
- in the same folder where the video is hosted on your computer.You will have the
option to edit the
panoramas that StreetBuilder creates and keep the same file name in order to work
directly with the
edited files. 

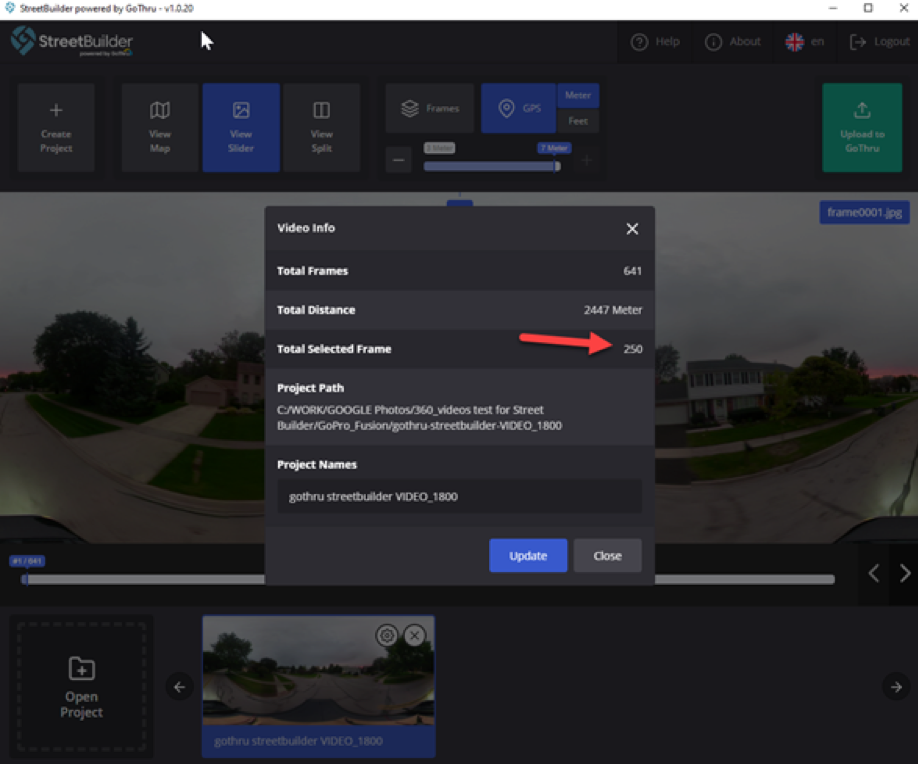
6. You can change the frame distance and the
type of
measurement, between meters and feet. In the example I have changed the distance
from 5 m to 7 m; it
takes few seconds for the system to recalculate and when you click on the video
details it will
display the new number of frames as 250. 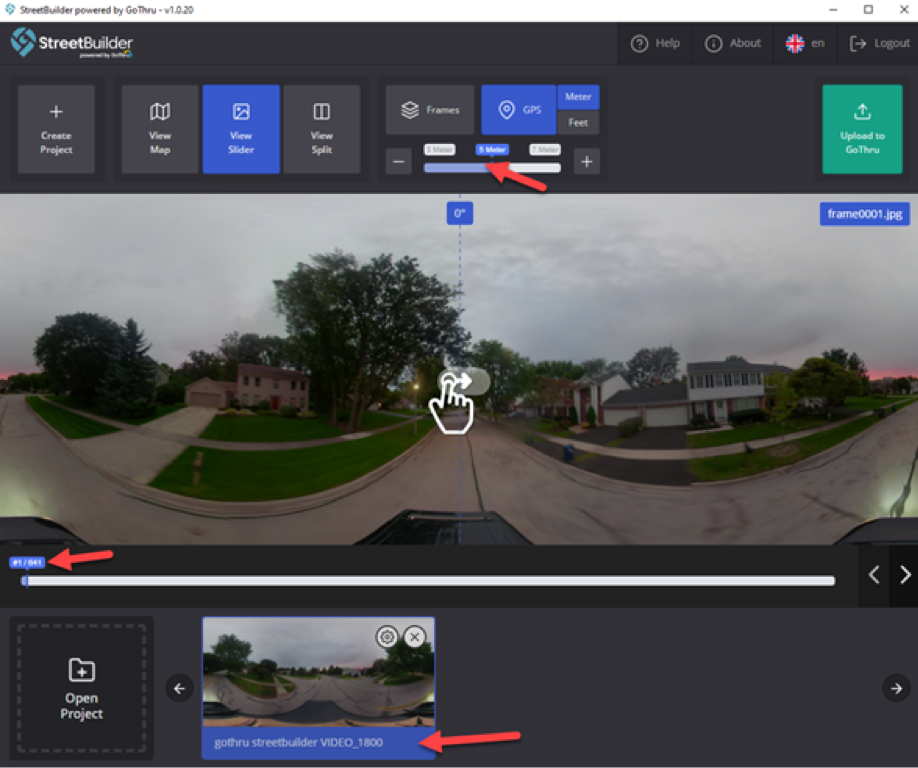
7. The app will open the project by default as
View slider.
There are 3 types of views: View map - where the frames are being displayed on the
map; View Slider -
it will display the panorama; View Split - will display the current panorama
positioned on the map, in
red, and the map. 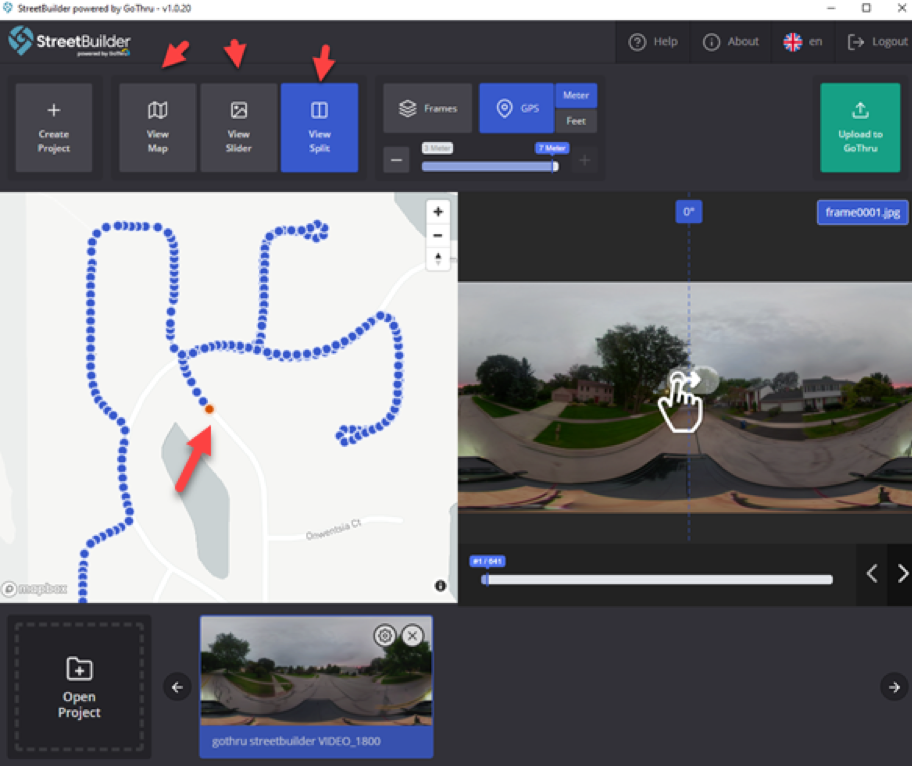
8. The Frames button will display the
connections between the
panoramas by default, calculated by StreetBuilder based on the panorama heading.
Before publishing, in
Gothru Moderator, you will have to adjust the angle between the panoramas. 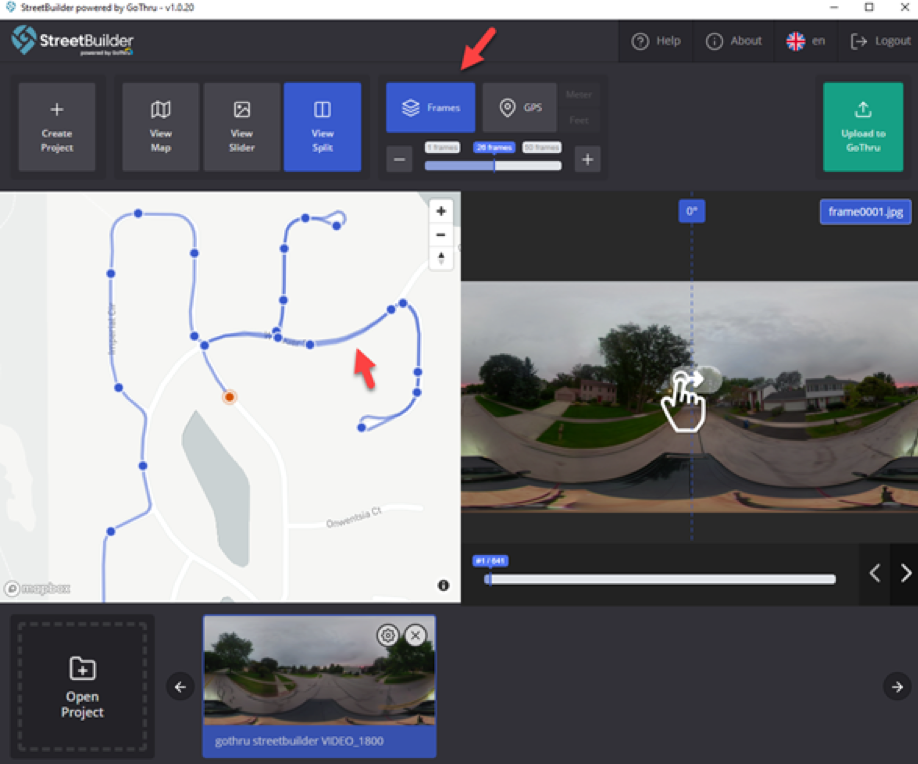
9. The “GPS” button will automatically create
the connections
based on the GPS details extracted from the video exif file. 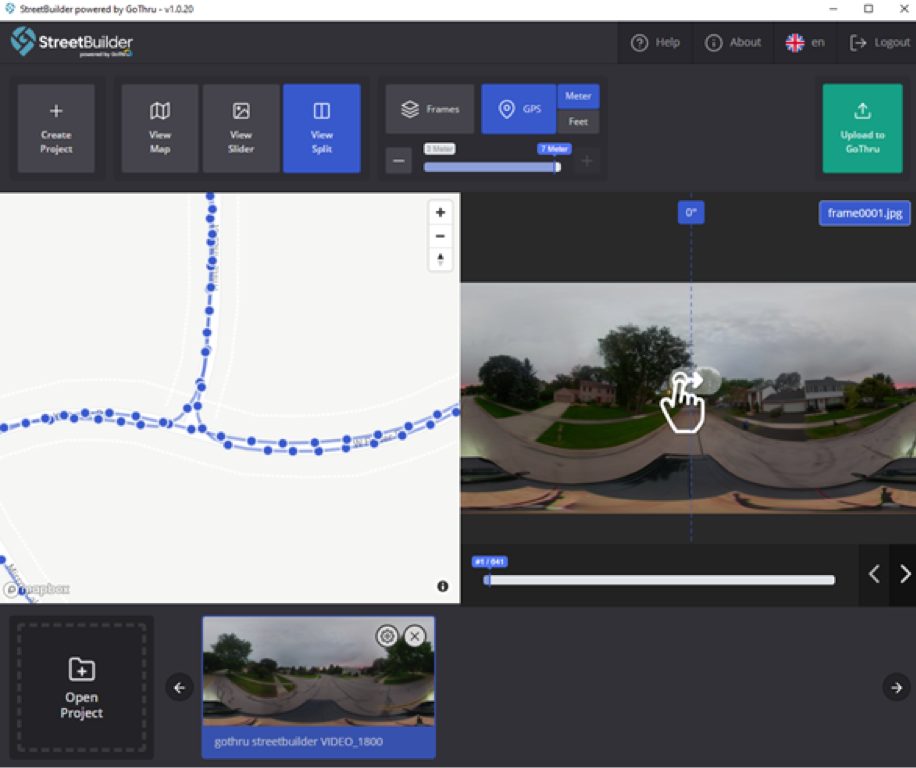
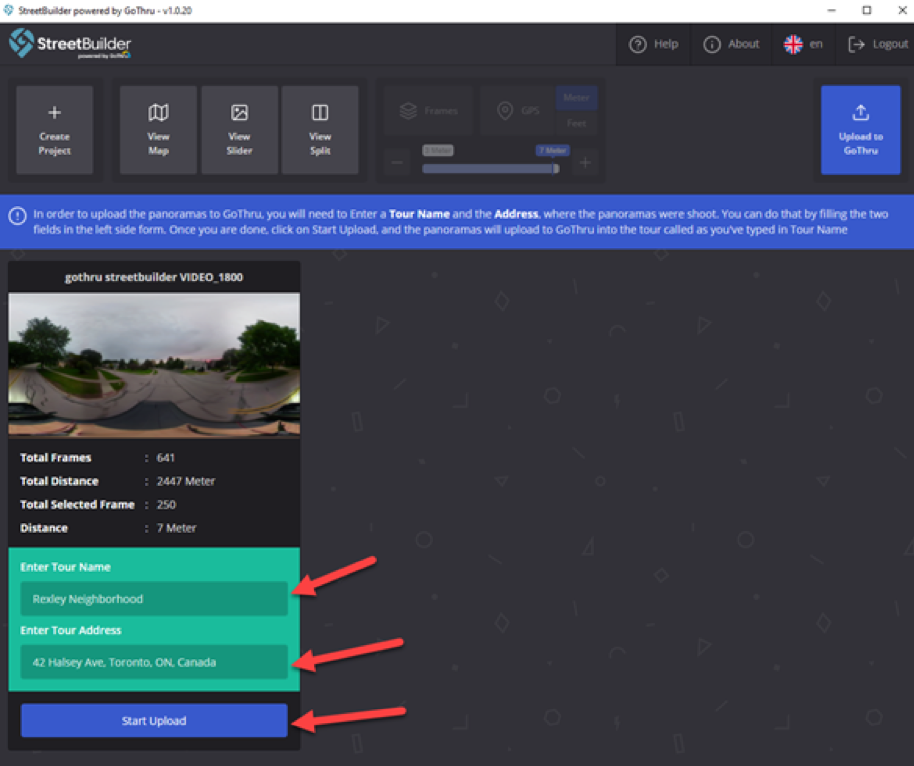
10. When you are ready to publish the
constellation, click on
Upload to GoThru button and the system will ask you to assign a Tour Name and
Address. If the video
has GPS details, the system automatically will detect and add the address, so you
will need to add
just the Tour Name. 
11. It will take a few minutes, depending on
the project size,
for the constellation to be uploaded on GoThru servers - make sure your Internet
connection is
working. The system is displaying the status of the upload and all the project
details, like Total
number of frames, Total distance of the project, Number of frames selected and the
distance between
the frames. 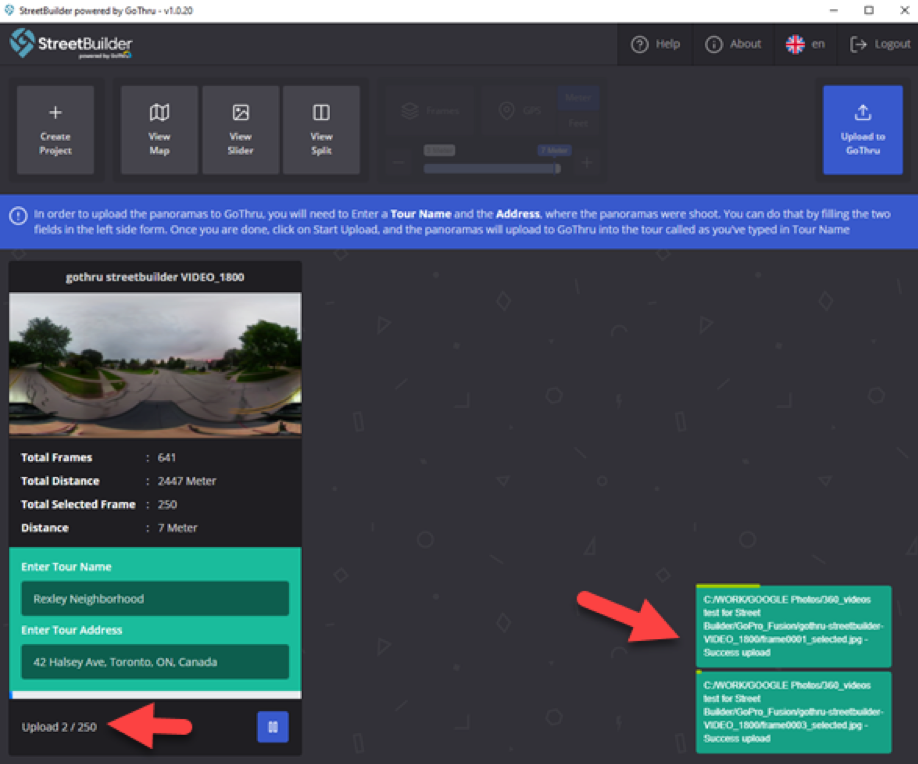
12. Once the upload is finished, you have two
options: to go
Back and make changes to the project; or to View the project in GoThru 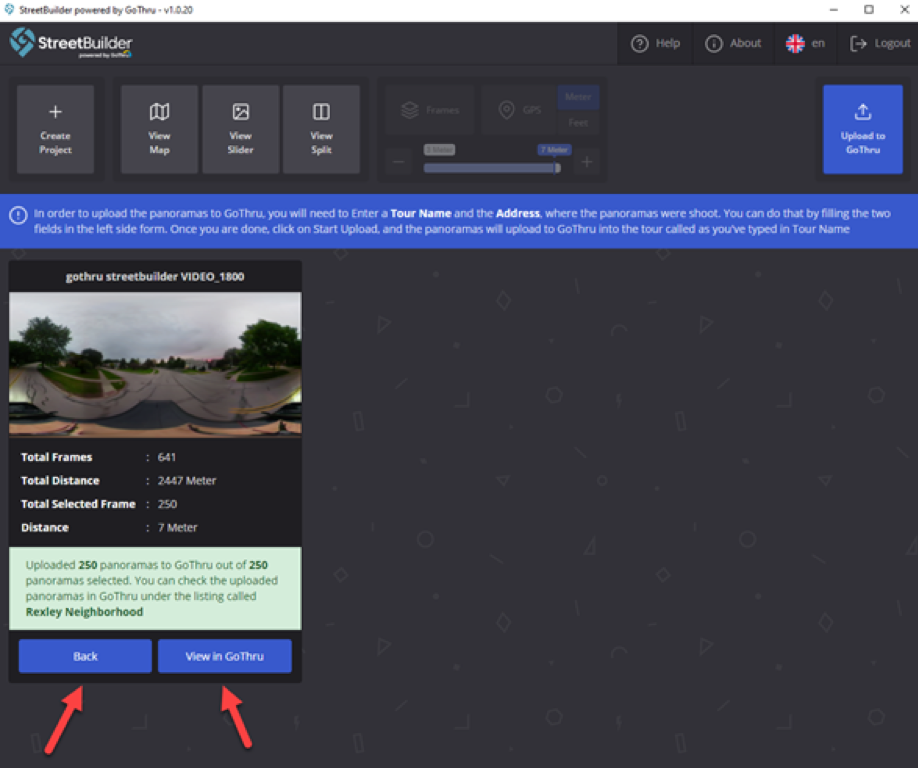
13. If you clicked on View in GoThru you will be redirected to gothru.co and asked to SignIn. Make sure to use the browser where you signed in with the same credentials that you signed in StreetBuilder.
14. Once logged in GoThru, under the
Constellations tab, you
will be able to locate your project 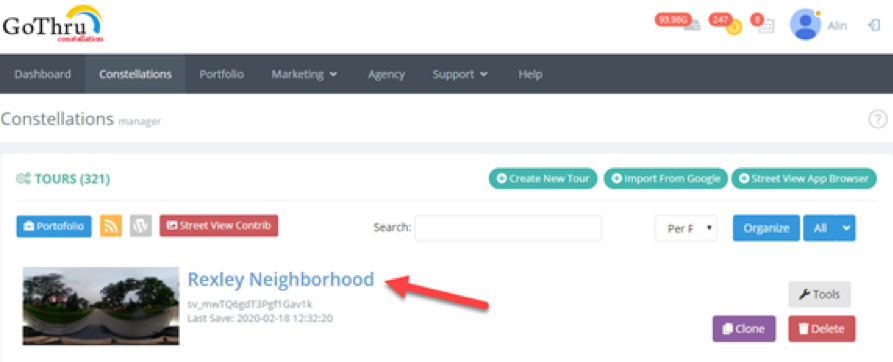
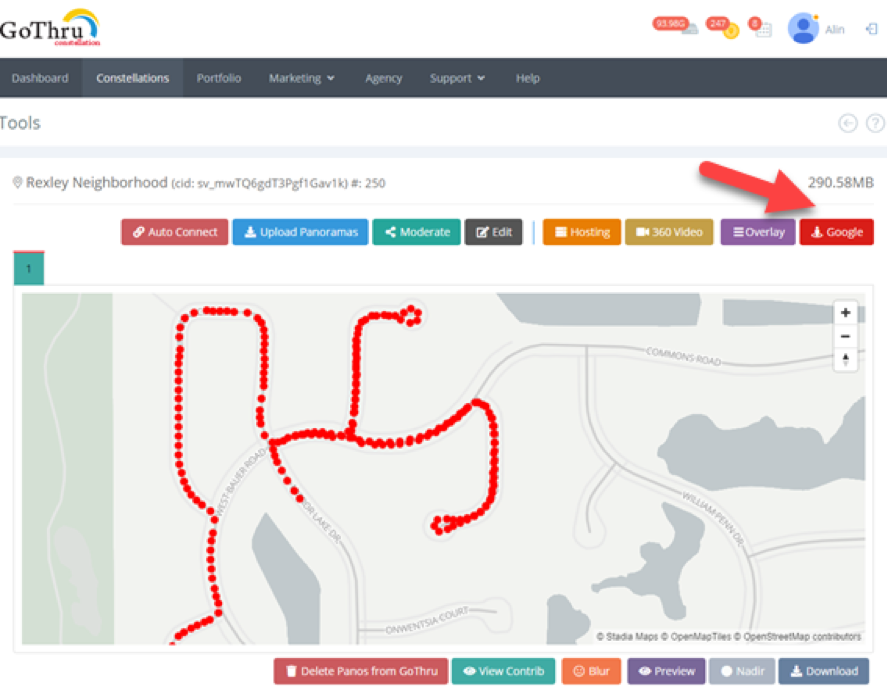
15. Open the constellation from under Tools and
you will have
the option to go and Edit your panoramas (if you haven’t done it at an earlier
step), by clicking on
the Edit button. When you re-upload the updated panoramas, make sure you keep the
same file name, so
the old ones will be overwritten by the new ones. 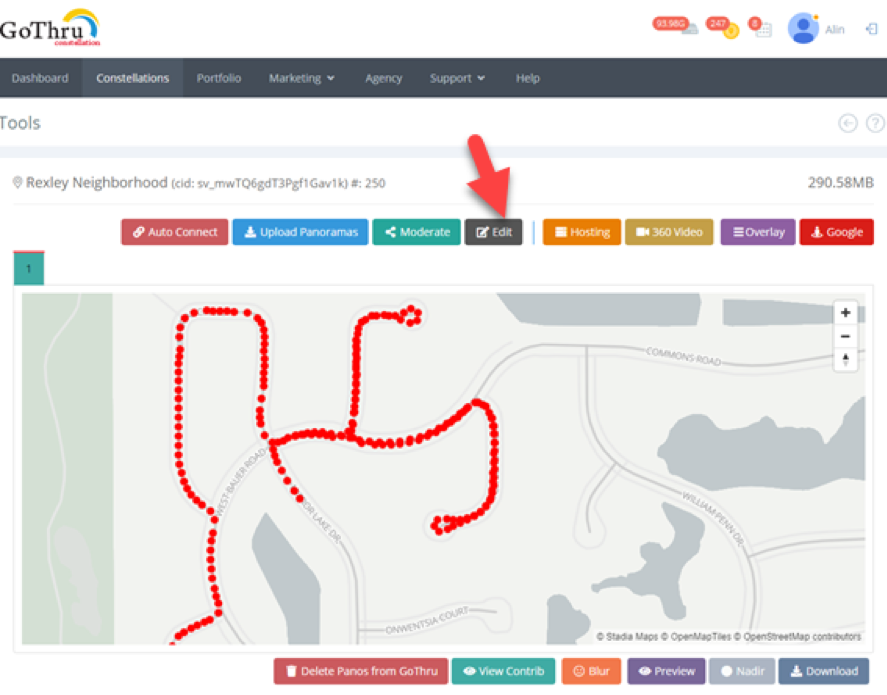
16. Go ahead and publish by clicking the Google
button.